Welcome to Documentation!
Thanks for Buying
First of all, thank you for buying this template. To make your experience pleasant, we've added as much info as needed in this documentation. If you're stuck with anything, please refer to chat whatsapp.
- Created By: Temabanua
- Official Site: Temabanua
- Instagram Updates: @temabanua
- Facebook Updates: Temabanua
Installation
Install the theme. The installation method is very easy.
Installation
- Go to Gmail and next to Content, click the Download button. On the dropdown menu, click on All files & documentation.
- Extract the zip file in your computer. Browse through the folder that starts with the name Theme Files > Template.xml. You will find the .zip file here.
Read how to solve problems in error files...
- Login to Blogger dashbor and browse to Theme or Template > Edit HTML.
- Click on Download Full Template to Backup your previous template.
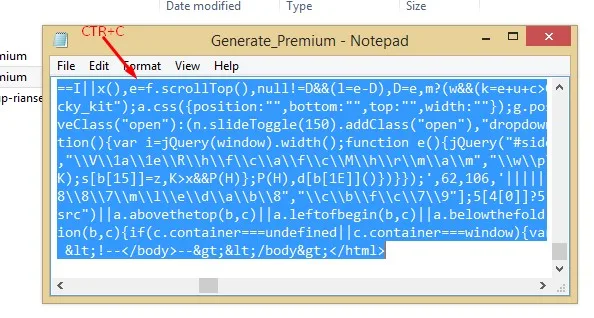
Open .xml file using text editor like notepad, wordpad, notpad++ or something like that.

In the text editor, press ctrl+a and then ctrl+c (ctrl+a to select all coding, ctrl+c to copy the selected coding)
- Now open HTML Editor on blogger dashboard and click "Edit HTML" button.
Click anywhere in HTML Editor. Now press ctrl+a and then ctrl+v (ctrl+a to select all coding, ctrl+v to replace selected coding with copied template coding). Finally click "Save theme" button.
- Now you're done.
- All done. Now proceed to What to do next?

Import Demos
If it's a fresh site (or a test site) with no content, it's a good idea to import one of the demos with Full Content to get you started. You don't want to do it on a live production site as it will import several posts, pages, and images.
Go to Blogger > Settings > Import content.
Click to Import.
- Open template folder name Demo Files select,
backup_post.xml.


Tip If the blog already has some content, this method is not necessary!.
Setup Your Blog
Once you're done with theme installation, it's time to setup your blog. What to do next:
- Add your logo and configure your header.
- Setup Main Post.
- Follow Adding Posts section to add a few posts.
- Learn how to setup your homepage.
- Customize fonts & colors, if you want to.
- Read other sections on the right side of this documentation.
- Got questions? Refer to Frequently Asked Questions.
License Verification
You must verify the Blog ID code you are using for this template.
- To get template license code, please copy it
Blogger dashboard menu > View number URL
Example of a blog ID code number 2350447796002276149
- Contact developer by sending a WhatsApp message to +62858886624531
- Later you will get a
unique ID codethat can be placed into the license code template menu.

Settings Licensi
- Open dashbor Blogger > Layout > Settings Input Licensi.
- Content > Temple Unique code that you get from Developer.
Make sure you verify your Blog ID code correctly for the template to work.
Note License Code is required for premium users only. Not applicable for the free version.
Header Section
All function settings and template data. Be careful not to delete any code that is not recommended, as it can cause template errors.
To select your header layout:

- Open dashbor Blogger > Layout > Settings Curency.
USD/IDR/INR> You can change the currency according to the country.- Email Paypal > Use your Paypal account email.
Paypal only supports USD currency payments.
- Open dashbor Blogger > Layout > Settings WhatsApp.
- Site URL > Edit the text content with your number WhatsApp.
Number supports all countries globally.
- Open dashbor Blogger > Layout > Settings Payment.
- Site URL > Edit the text content with your data.
Do not delete any code other than replacing the text according to the template data.
- Open dashbor Blogger > Layout > Settings Image QRIS.
- Upload your QRIS image.
- Open dashbor Blogger > Layout > Settings Delivery.
- Set your shipping cost. You can also set it to
0for no shipping cost.
- Set your shipping cost. You can also set it to
- Click Save
Header Map Setup
Use your Business Location Map from Google Map by copying the link URL on Google Map.
- Go to Blogger > Layout > Widget Map Image.
- Click icon
 button.
 Configure widget

- Title your name or title blog.
- Caption your Address or Map location.
- Upload your logo with Input image URL or Upload image from computer.
- Link Open Google Maps > Find your Business Address or Location and Click Share > Embed map > copy src URL.
-
(Optional) You can set a different logo for the smaller one by enabling Shrink to fit.
Note This logo will be displayed at half the width and height. The double dimensions are required as mobile screens are Retina/Hi-definition.
- Click Save.
Setup Menu Profile Button
This button is useful for you to make others register membership or subscription buttons. You can direct them with the link you have set.

- Open dashbor Blogger > Layout > Widget Button.
- Edit the
textand change thelink URLas you specify. - Click Save
Setup Menu Sidebar
Setting up Navigation Menus works normally as it does for any Blogger Theme. If you're new to Blogspot, you can learn more about menus in this article (external).
Creating a New Menu
- Go to Layout > Widget Navigasi.
- Click icon
- Add A New Item :
- Site name > your text menu
- Site URL > your URL / Pages blog
- Click Save Menu and that is all.
Note You can also add unlimited widgets from blogger. For example Archive / Label / Menu.
Seting Up Your Homepage
There are a few ways of setting up your home-page based on what you need:
-
Widgetized Label Homepage
Our default Homepage is built using this method. It's for advanced users but offers several widget post you can use on homepage. This is for paid users only
Go to Theme > Layout > Widget Barner Slider / Widget Icon Thumb > Gagdets.

- Upload an image for your background slider.
- In the Link column: fill in the link to your product or link affiliate.
- Click Save & Publish.
- Go to Layout > Widget Label Product.
Add a Gagdets type HTML/JavaScript, click Widget

Use the post labels on your blog :
Shortcode:
{getPosts} $label={Your Label}$results={Number of Posts}$type={Style Type}
Example of Style Display :
$type={feat}
$type={list}
- Click Save & Publish.
- Repeat to add more widgets.
NoteUse the HTML Widget method if you want to customize the appearance. All front page display settings are in the layout menu
Method 1: Default Homepage Image Slider & Image Icon.
You must upload image on computer or hosting image.
Widget Barner & Widget Icon Thumb
Upload the Image and Icon Thumbnail you want..
Method 2: Widgetized Label Homepage (Premium Version)
First, confirm the HTML type of widget you are adding. Then, set the layout and style of the widget homepage:

Note: You can add multiple model type widgets without limitations. You can also disable some widgets.
Setup Main Post
Access your blog Layout > and click ![]() in the Blog Posts gagdet gadget.
in the Blog Posts gagdet gadget.
Widget Settings:
- Number of posts on main page > Number of posts displayed on the home page.
- Post page link text > Write the title of the description in post.
- Author format > Writing from the author.
- Label text format > Recent post title in the post.
- Comment format > Comment type used. There are 3 types of Comment types available.

- Blogger Shortcode >
$type={blogger} - Disqus Shortcode >
$type={disqus} $shortname={Your Shortname Disqus} - Facebook Shortcode >
$type={facebook} $lang={Language Code}Facebook Language Codes :
en_USes_ESar_ARid_IDth_THvi_VNpt_BRfr_FRru_RUde_DEit_IT
- Blogger Shortcode >
- Click Save.
Adding Posts
Adding a new post work the same way as a default Blogger installation. For an extensive guide on adding posts, check this guide.
Post Settings
It is highly recommended to enable this setting in blogger.
Go to Blogger > Settings > Posts

- Image lightbox > Disable
- Lazy load image > Enable
- WebP image serving > Enable
Add Image Gallery
While the theme can function without featured images, it's highly recommended that you add a featured image to each post. This not only makes your site/blog more lively but also improves user experience.
Must use a total of at least 5 images. Do not use only 1 image if you want the template to run normally for the results.
To set the featured image, use the Blogger normal method.

Recommended Image Size
Image size (dimensions) will depend on what type of layout you're using throughout your Blogger or per individual post basis. This image will not only be used on the post, but also on the category listing pages.
- Compatible with all layouts and default slider: 500px minimum (width x height).
- Note: Make sure to upload images on blogger using the final URL must be like this
.jpg/.png/.webp/.jpeg/.gif
Note Template uses Blogger standard cropping and resizing method.
Post Product Format
There are 2 ways to create a format post, please choose one below.
Add Price
The currency symbol will depend on the language of the blog you are using. Write price/YOUR_PRICE and give it a center stroke writing style. See example image below.
Shurtcode :
price/1234Product main price e.g: $12.34 / Rp12.34 etc
price2/2345Product strikethrough price e.g:
$2345 etcstok/0If the product status is out of stock. If it's not finished, there's no need to write it.
label/Your TextProduct label writing e.g.: Free / Delivery etc.
afflink/Your Link AffiliateIf you have someone else's product link or custom payment link button.

Example of writing prices :
price/240

Example of writing strikethrough prices :
price2/320
Note Make sure you use the blog language according to your country's language.
Adding a Affiliate Button
You are free to direct this button wherever someone tries to click. For example, to the WhatApp chat number and Telephone. You can also use it as a payment button, for example to Paypal etc.
Example of writing affliate link :
afflink/YOUR-URL-AFFILIATE
Video Embed Youtube
Select a Youtube video and click the Share button. Copy the youtube embed code.

Paste the video embed code from YouTube in the blogger post column.

Note Change your blogger post mode to HTML view mode, not Compose view.
Adding Pages
Creating pages is a simple process just like a default Blogger. If you're unsure, learn more about pages.
Adding Checkout Page
To add Checkout Page :
- Open Blogger > Pages > New Page.
Add title page " Checkout " , Do not use any other title than this

- Leave the content blank. Then publish the page.
- Make sure the page URL is /p/checkout.html
All checkout and shopping cart pages will redirect to the above URL.
Color, Style & Typography
Color / Style / Typography settings are located in Theme Settings.
Color & Style
Customizing the Colors & Backgrounds
- Go to Theme > CUSTOMIZE > Main color theme.
- Usually you may wish to only change Main Theme Color from General. This will effect several crucial areas of the theme and acts more like a skin.
- If the Main Color changes are not enough, adjust other colors as you please.
- Save & Publish.
Typography
For typography, we use Google Web Fonts. It's usually best to leave the typography at default, but typography elements have suggested font families or fonts as alternatives.

- Go to Theme > CUSTOMIZE > Advanced.
- Select a font you like as the Primary Font, Heading Font etc.
- Experiment to get the best effect - the preview is updated instantly on the right.
- Save & Publish.
Blog Language
This template comes with files that include all languages from blogger. To use it:

- Go to Settings > Blog language.
- Select the template language you want.
Advanced Customizations
If you are looking for layout customizations beyond the Style & Typography settings built into the theme, it's important to judge the nature of customization.
If the layout change is simple, this can most likely be achieved using Custom CSS. However, for something where it is not possible to use one of these, it is recommended to enter the theme HTML.
Custom CSS
Go to Theme > CUSTOMIZE > Advanced > Add CSS

- Click save & publish
Note It is recommended that you already understand what CSS functions are
Frequently Asked Questions
-
How do I want to display my profile?
(a) Using profile blogger
The original feature of Blogger blogs was called author profiles. This allows you to create name and profile quotes for readers to see.
» Learn about profile blogger.
(b) Author Box
The widget receives the blogger profile informations automatically, As long as your profile is marked as public. The icons are displayed if there are links in the introduction.
- Go to Settings > General > User profile.
Find for Additional Information > Introduction and add your description with HTML links.

- To be able to use URL links use icons. See list of supported icons.
- Save.
Note The "Introduction" is required for the author box to be displayed! But the links are not required.
How do I want to display ads?
- Go to Layout > Advertisment.
This advertising widget only appears on the article posting page.

- Click save.
My featured post doesn't appear on the homepage.
If you already have posts when activating the theme, you will need to refer again to the Blog feed section and select Full.
Go to Settings > Site Feed > Allow blog feed > Full

Copyright & Credits
This guide is only intended for blogger template users from temabanua.
Resources Used
- Bootstrap
- jQuery
- Material Icon
Posting Komentar
<i rel="pre"></i>untuk blok kode<i rel="blockquote"></i>untuk kutipan<i rel="code"></i>untuk beberapa kata kode<i rel="img">URL image<i>untuk menempelkan gambar (harus di-hosting di tempat lain)